Part 1 of this post covers the CRM-SharePoint (on-prem to on-prem) integration using a custom grid extensively. Anybody can build the integration in a couple of hours with the code snippets and details available in that. If you haven’t read that post, I strongly suggest you go through it before reading this.
This post is an extended version and it’s about how the custom grid to handle SharePoint integration can be added in the left navigation menu of the form rather inside the form itself.
If you aren’t familiar with the keyword, ‘left-navigation menu’, this is what I was talking about.
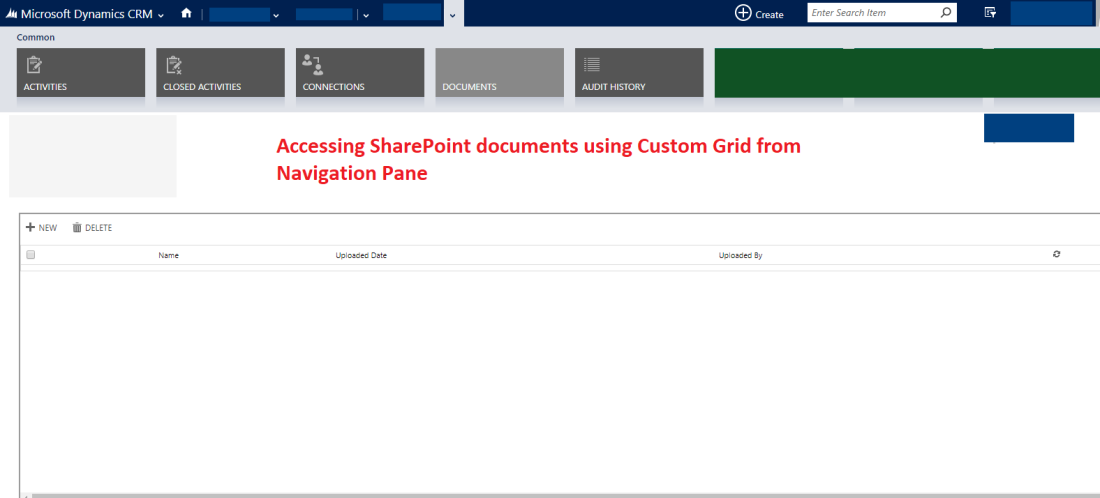
I understand what you think of now, “Uggh, common man, I use it every day to find the related records”. Yes, it’s the one.
As you can see, the custom page is added to the left navigation menu, let’s see how it’s done. I had removed the default link to ‘Documents’ and add a new navigation link to my HTML i.e. default CRM-SharePoint grid isn’t shown anymore to the user unless there is an error.
Steps to build it:
Step 1: Create a HTML web resource with an IFrame and call the same URL, that points to the Home page (aspx) which we created in the last post.
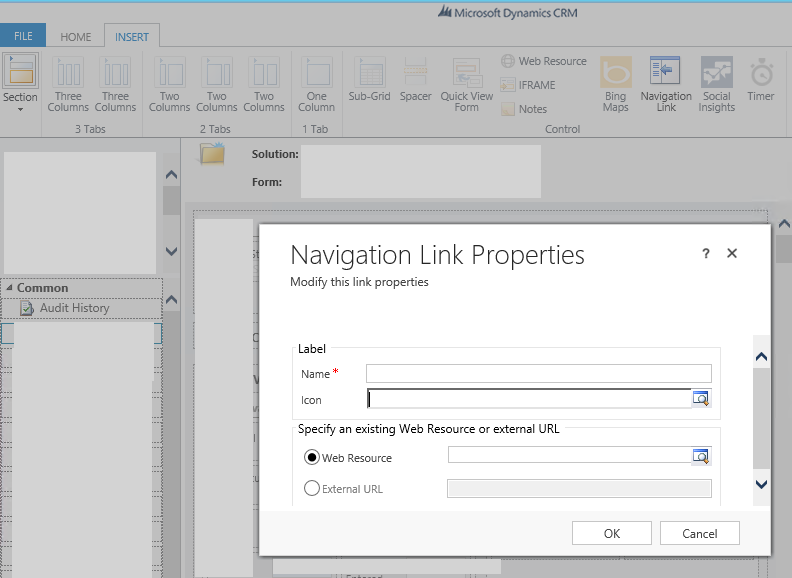
Step 2: Create a navigation link and add it to the Form to access the created html file.
Step 3: Add PassParams=”1″ to the NavBarItem property of the customization.xml.
Step 4: Providing necessary security role privileges for non-admin users to access the new link.
1. Custom HTML File to render the grid
Below is the HTML code I used, if you observe, Xrm.Page.context.getQueryStringParameters(); is the key method that helps us to the required values, without the changes mentioned in Step 3, this will return NULL value.
<html><head>
<style type=”text/css”>
.displayAll {
display: block;
width: 100%;
height: 80%;
margin: 0 auto;
}.grid-header {
font-family: Segoe UI, Arial, sans-serif;
margin: 0px;
padding-top: 10px;
padding-bottom: 24px;
font-size: 36px;
font-weight: lighter;
}
</style>
http://../../ClientGlobalContext.js.aspx
http://../../iwf_/jquery1.11.3.min.js
$(document).ready(function () {
debugger;
// Retrieve the id from the query string
var queryStringParam = Xrm.Page.context.getQueryStringParameters();
if (queryStringParam) {
var orgNamae = queryStringParam.orgname;
var schema = queryStringParam.typename;
var id = queryStringParam.id;
var oTypeCode = queryStringParam.type;setIFrame(orgNamae, schema, id, oTypeCode);
}
});function setIFrame(orgName, entity, recordId, oTypeCode) {
if (orgName && entity && recordId && oTypeCode) {
try {
if (entity == “new_account”) {
var url = sharepointServerURL + “/SharePointCustomGrid.aspx?Id=” + recordId + “&schemaName=” + entity;
$(“#iFrameSPGrid”).attr(‘src’, url)
}else {
var url = “/” + orgName + “/tools/documentmanagement/areas.aspx?formid=9fa89fc9-47b3-4205-b023-fa01b90aa6bf&oId=” + recordId + “&oType=” + oTypeCode + “&pagemode=iframe&rof=true”;
$(“#iFrameSPGrid”).attr(‘src’, url);
}
} catch (e) {
console.log(‘Error in setting iFrame.’ + e);
var url = “/” + orgName + “/tools/documentmanagement/areas.aspx?formid=9fa89fc9-47b3-4205-b023-fa01b90aa6bf&oId=” + recordId + “&oType=” + oTypeCode + “&pagemode=iframe&rof=true”;
$(“#iFrameSPGrid”).attr(‘src’, url);
//alert(“Error in retrieving the documents, please contact the support team.”)
}
}
else {
console.log(‘Unable to retrieve the documents, one of more required data is not retrieved. orgName: ‘ +orgName + ‘ entity: ‘+entity +’ recordId: ‘ + ‘ oTypeCode: ‘ +oTypeCode);
}}
<meta charset=”utf-8″>
</head>
<body>Attachments</div>
</body></html>
If you observe, if there is any error or without enough data, default CRM-SharePoint grid is shown to the user (better to show something and allow users to access the documents than throwing an alert) :).
2. Create Navigation Link to access the HTML file
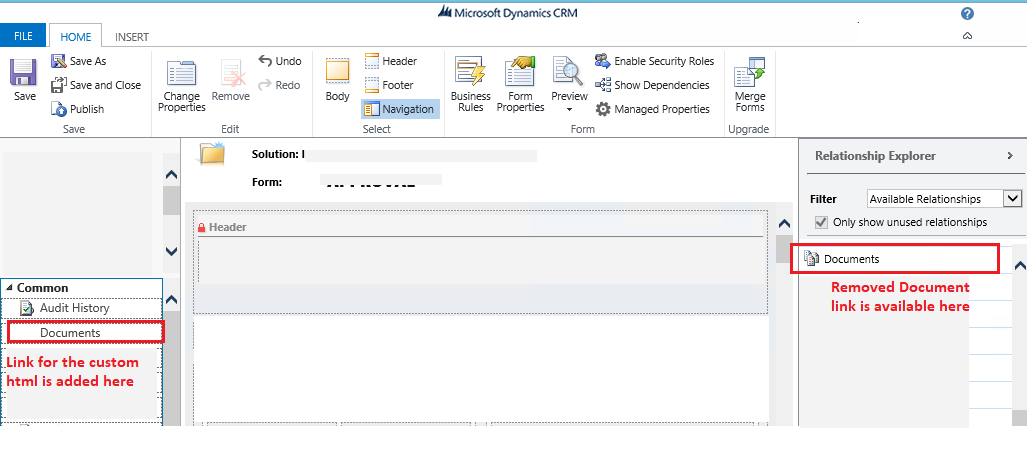
- Open the form that needed the navigation, click ‘Navigation’ as highlighted below and remove the default ‘Documents’ available in the left navigation. Don’t worry, you can add it back any time, it just gets removed not deleted

- Click Insert -> ‘Navigation Link’, choose the HTML. It will be added to the left navigation.
- Once added, it’s gonna look like this. If wanted to revert, just remove the new link and add the native Documents link.
3. Add PassParams=”1″ to the NavBarItem property of the customization.xml
Yes, it involves manual editing of the solution file but doesn’t need it to worry, it is supported.
Kindly refer this for doing this step. It is explained well by Guido Preite. After the changes, reimport the solution again for proceeding further.
3. Add PassParams=”1″ to the NavBarItem property of the customization.xml
To access the document navigation for non-admin users, give access to the ‘ISV Extension’ privilege under the Customization->Miscellaneous Privileges section. (This guy was the trickiest part and took a while to figure it out).

And that’s all, you got the same grid available in the left-navigation menu now.
Summary
A custom grid is needed to access the SharePoint documents to avoid the famous Chrome issue. It can be added to the Form itself or to the navigation menu as mentioned in this post, whichever the users are familiarized with, go for that.
Please leave your feedback in the comment section.
Do not forget to like and share this post. Happy Learning!
