With the release of Dynamics 365 for Customer Engagement apps version 9.0, Microsoft has introduced a new user experience, Unified Interface (UCI) – which uses responsive web design principles to provide an optimal viewing and interaction experience for any screen size, device, or orientation.
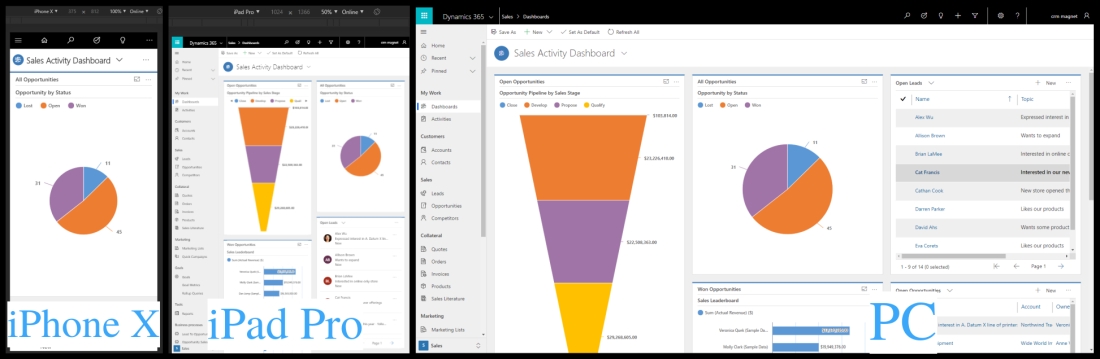
The new Unified Interface brings all the rich experiences to any client that you are using. Whether you are on a browser, tablet, or phone, you will be able to consume similar experiences. What does that mean? Check out how the ‘Sales Activity Dashboard’ is displayed in different devices of different sizes.
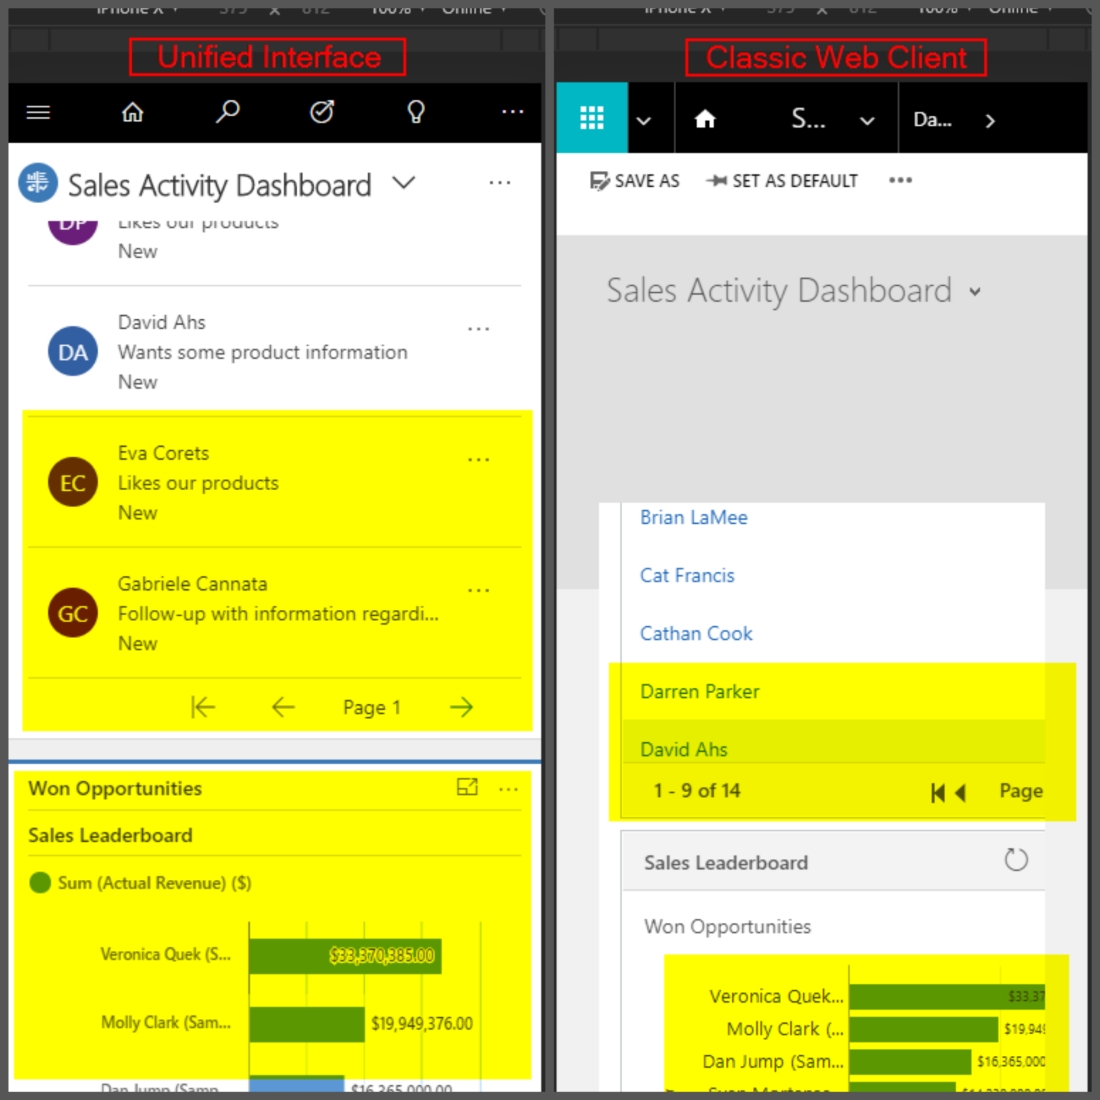
As you can see below how the grids and charts are rendered properly in Unified Interface but not in the Web Client when accessed in the phone.
There are lots of articles and video around to learn more about the UCI. Some notable references for this are,
- Microsoft docs: https://docs.microsoft.com/en-us/dynamics365/customer-engagement/admin/about-unified-interface#getting-started-with-unified-interface-experience.
- A good video about the UCI features from Deepesh Somani.
We aren’t going to see about the UCI in this blog rather we will see on a high level about how we can try out and do the onboarding process to the Unified Interface without affecting the current Web Client Interface that the users are using, and a couple of useful tips.
1. Reviewing Unified Interface using a sandbox instance
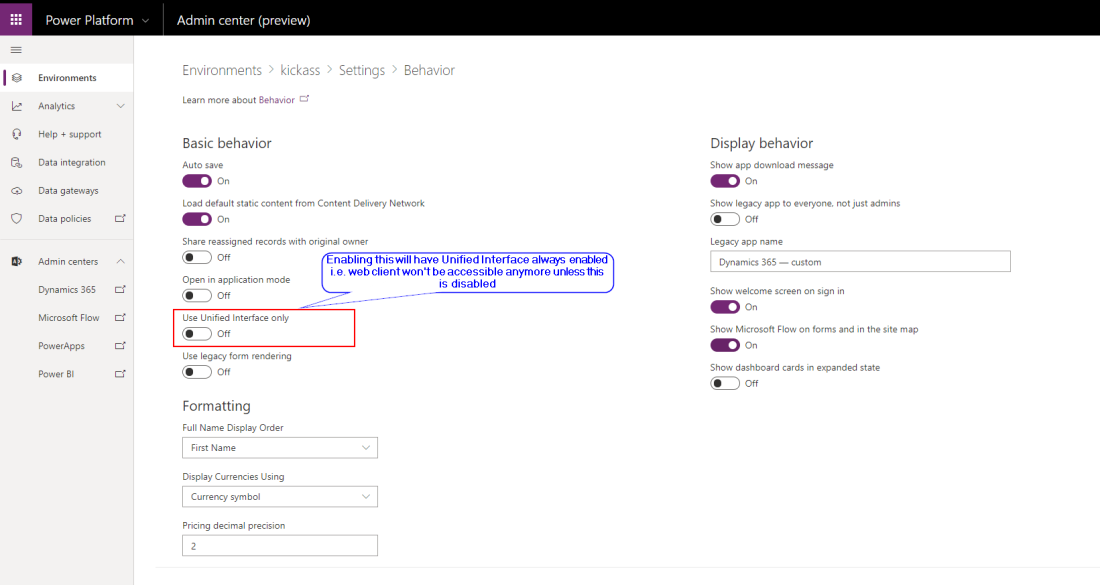
If you are currently using the classic web client, the quickest way to review UCI with the existing customization in Web Client is to create a new sandbox environment and enable the UCI either through the Power Platform Admin center as shown in the below fig.
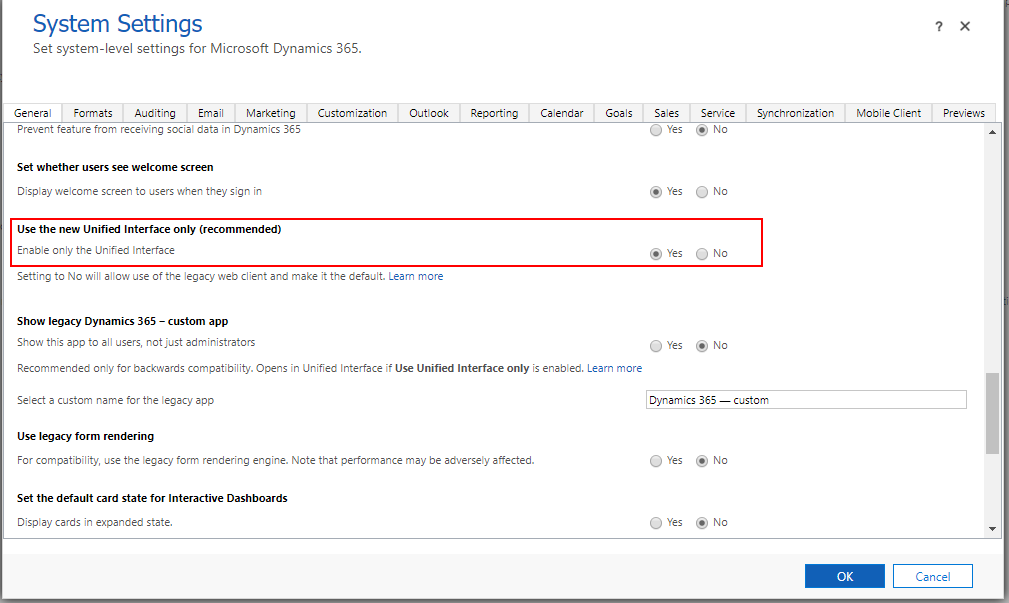
Or through the Settings->Administration->System Settings as below.
2. Trying out Unified Interface without affecting the current Web Client
There is also a provision to try out the UCI without creating a sandbox, as you can see below, I have a web client and the UCI running parallelly in a different app.

Steps to create a dedicated UCI app without affecting the current web client:
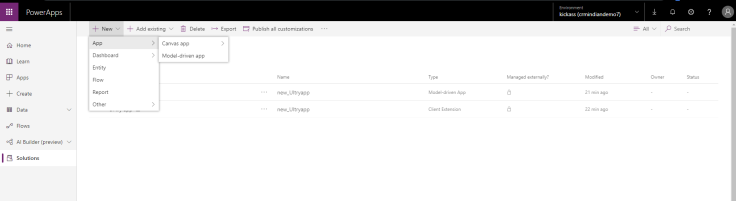
- Create a new solution and add a new Model Driven App
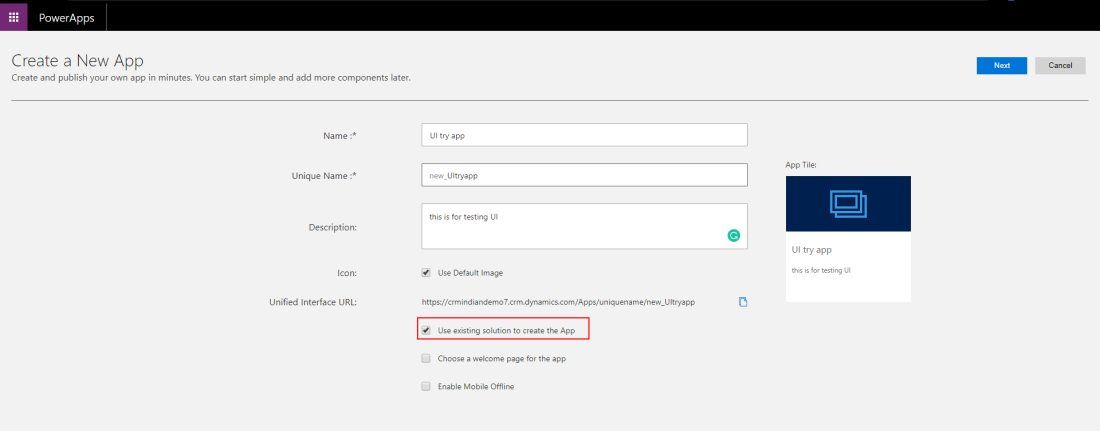
2. Enter the App name and details, I’m choosing using an existing solution.
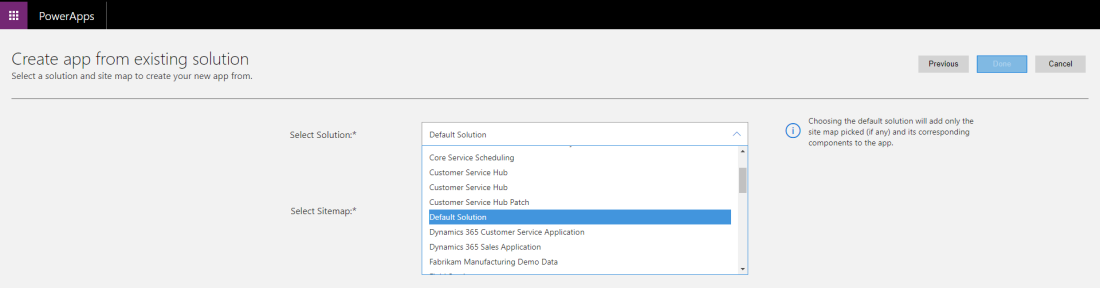
3. Choose solution – You can choose any of the existing solutions since we chose the option of choosing an existing one, the current solutions appear here.
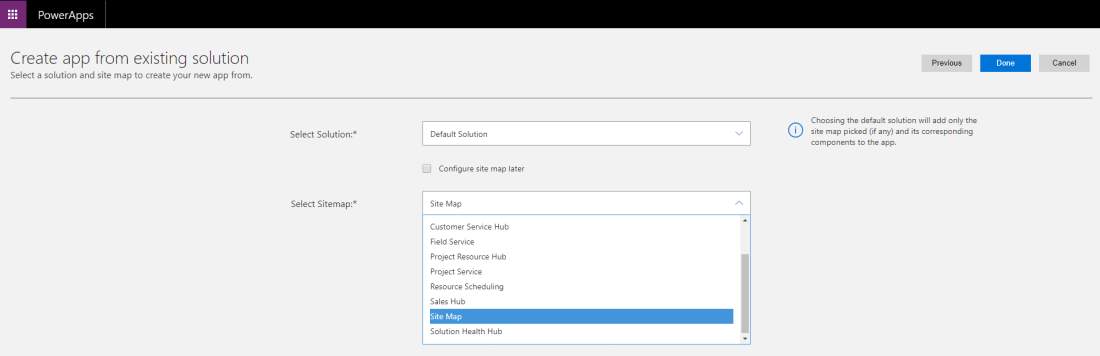
4. Choose sitemap – You can choose any of the existing sitemaps and select ‘Done’.
5. Publish & Play – Once done with the changes, publish the app to take the customizations into effect and click ‘Play’ to start using it 🙂
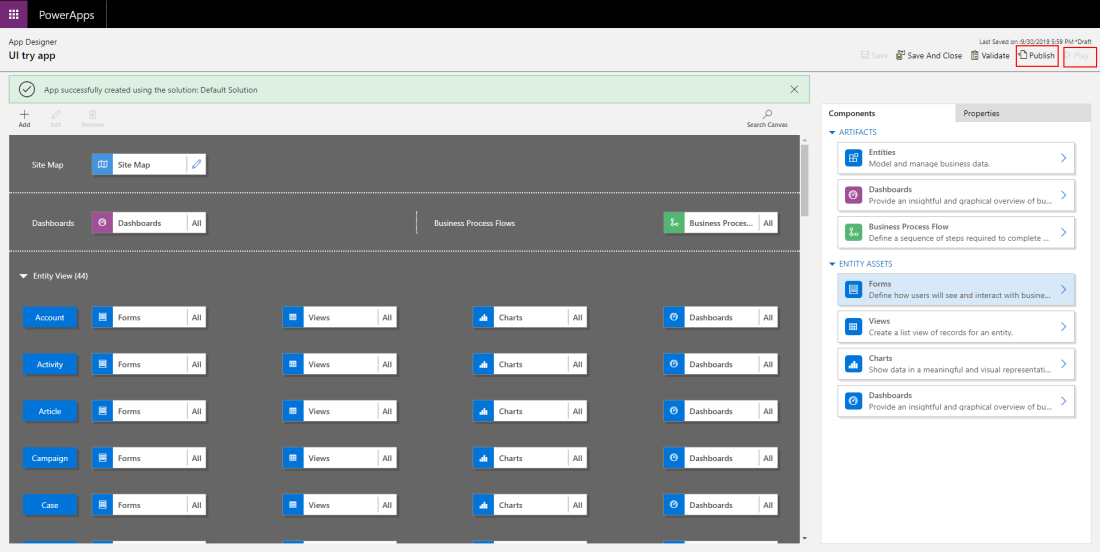
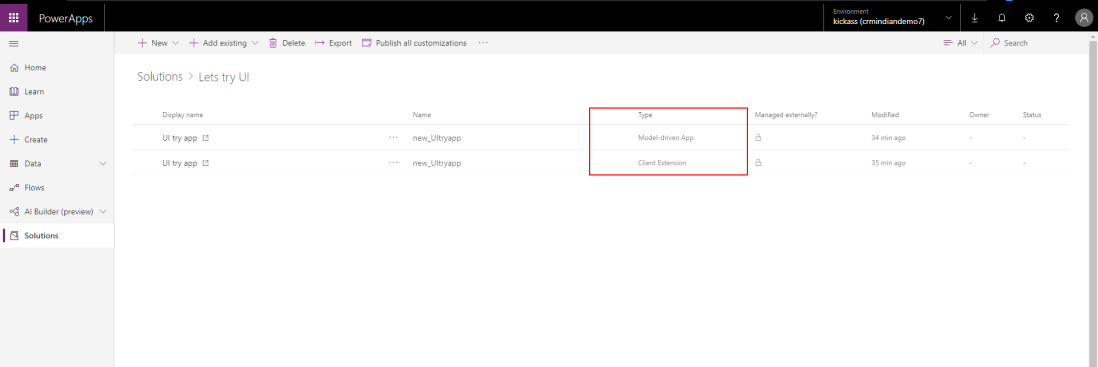
As you can see, both the app and the sitemap are within the solution now.
3. Assign security roles to the user for trying it out
Navigate to the app just created, you can do it either by going to the home.dynamics.com and select the app that was just created. If you don’t see the here, press the sync button and it will appear.
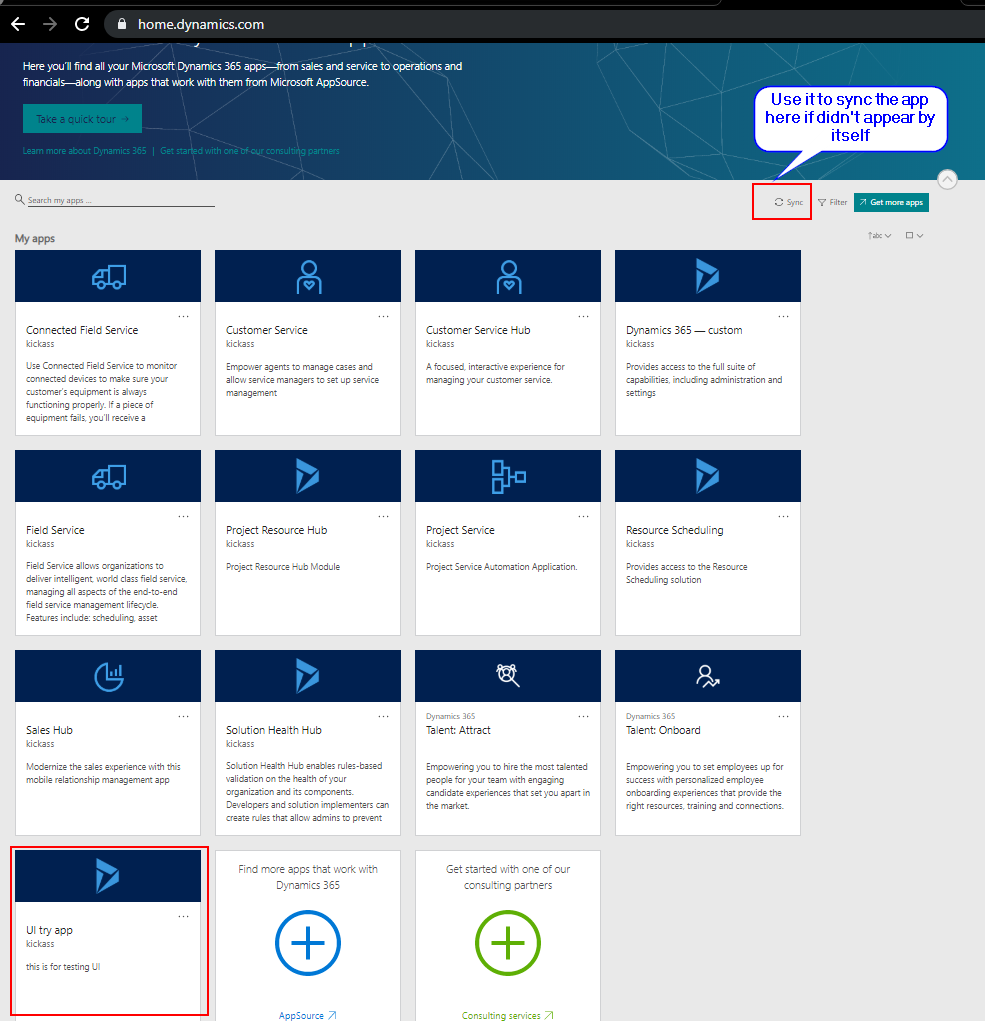
Alternatively, you can also navigate to the list of apps by appending ‘apps’ with the main URL like below.
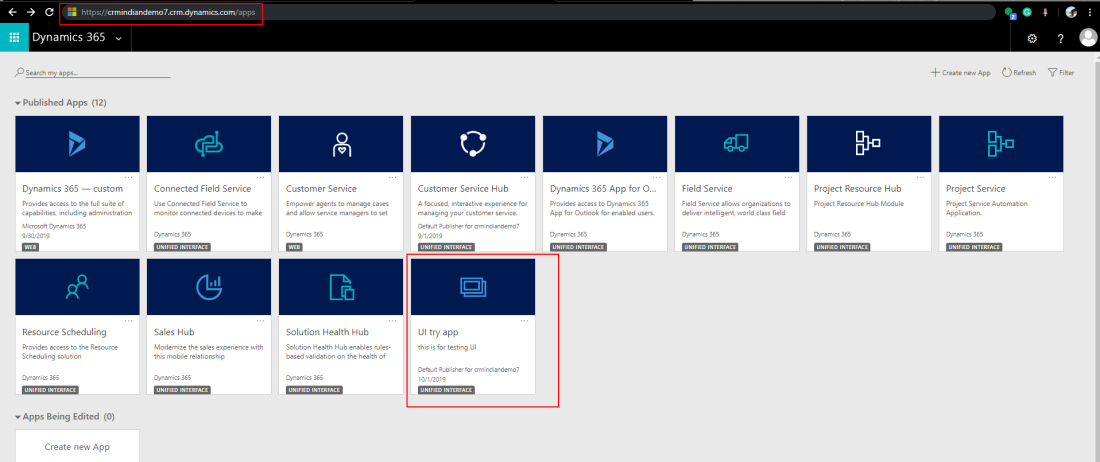
Select the eclipse icon and choose ‘Manage Roles’ to assign the necessary security roles for this app.

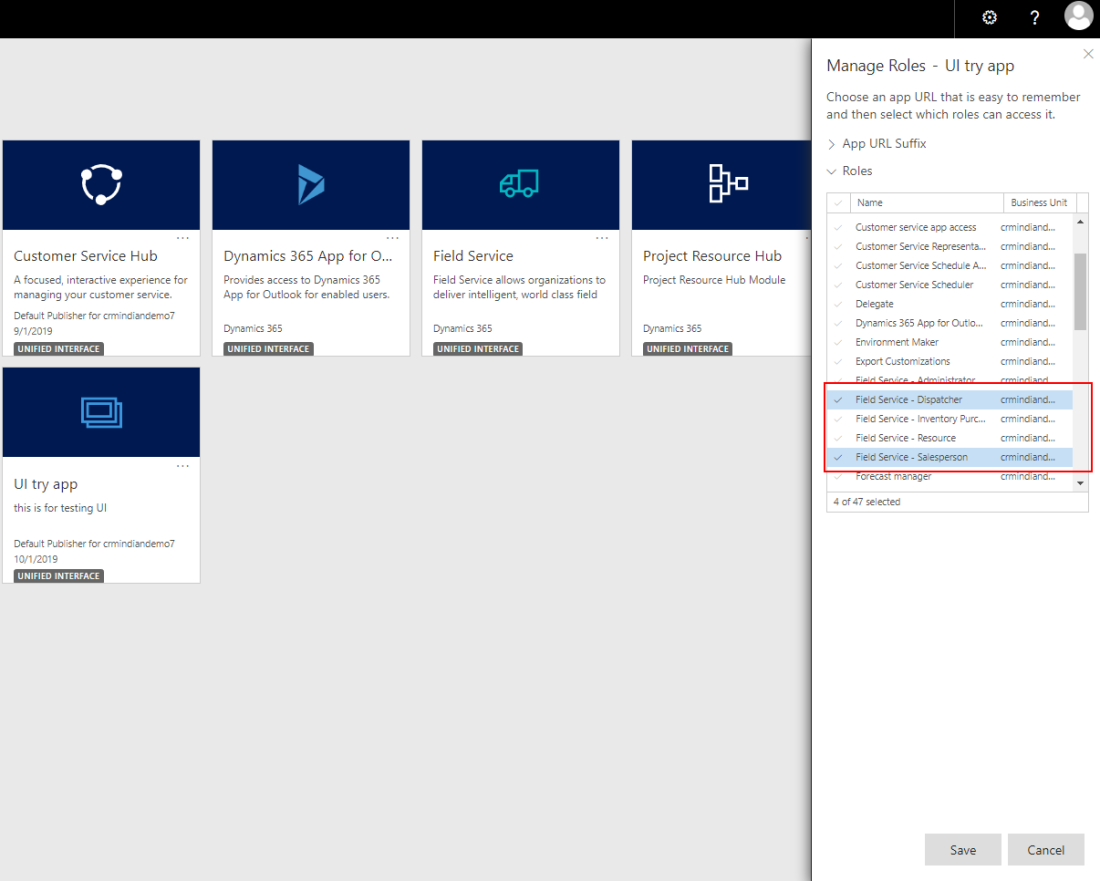
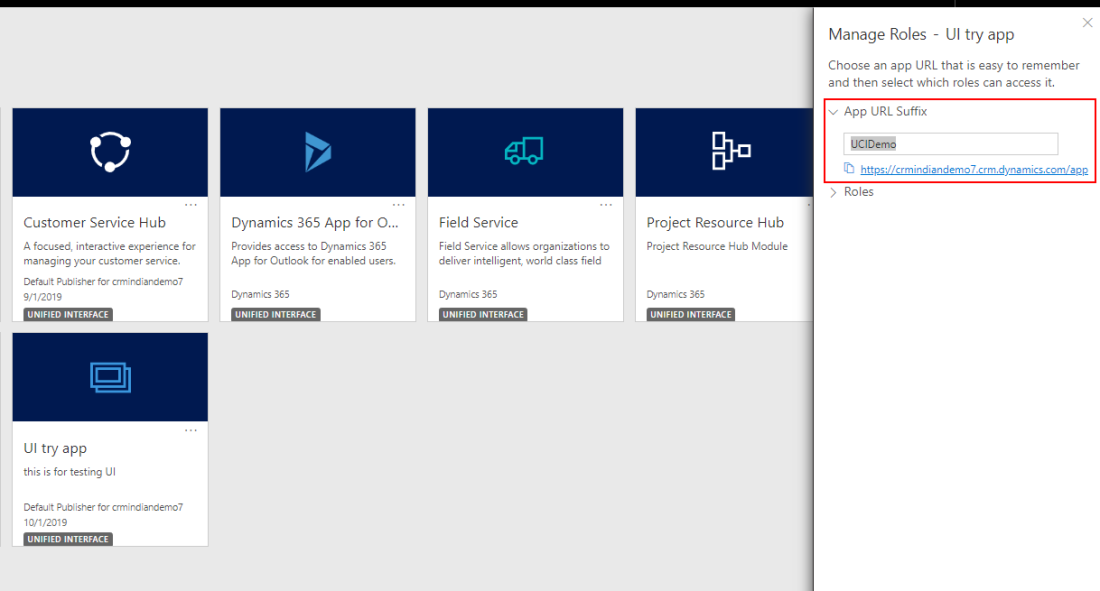
4. Accessing Model Driven App using a friendly name
The app can be accessed by using a friendly URL for faster access. Set the friendly name that you want to give to the app to access via URL and save. The URL will be generated for your reference, the same can be shared to the Users to start trying it out.
URL: https://crmindiandemo7.crm.dynamics.com/apps/ucidemo
Please don’t forget to like and share this post. Happy Learning!
